Configure SMTP mails on wordpress
PHP mail functionality is blocked on Middlehost to prevent SPAM. To enable email functionality, you can authenticate your WordPress site using an email account.
1. Login to cPanel
Follow this cPanel Login Guide to access your cPanel.
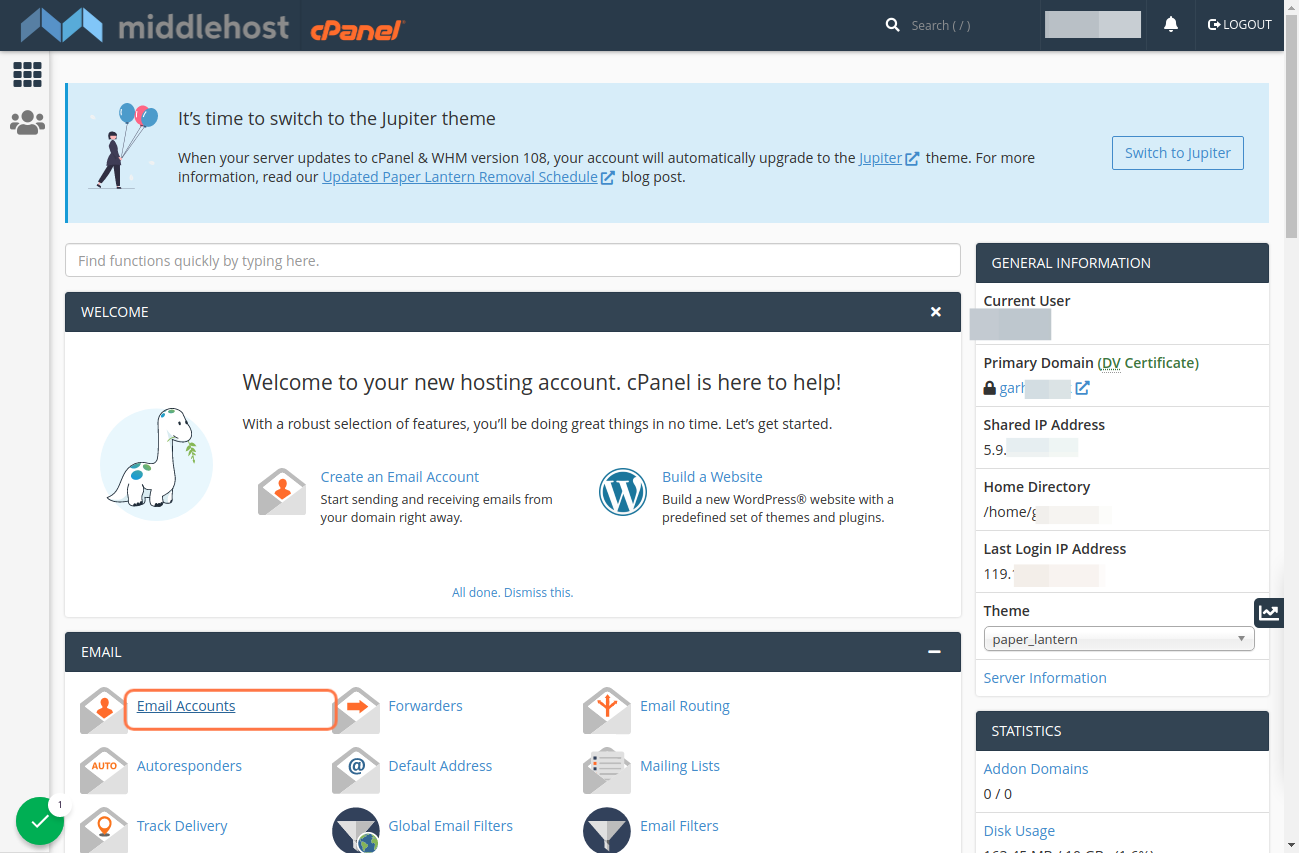
2. Navigate to Email Accounts
3. Create a New Email Account
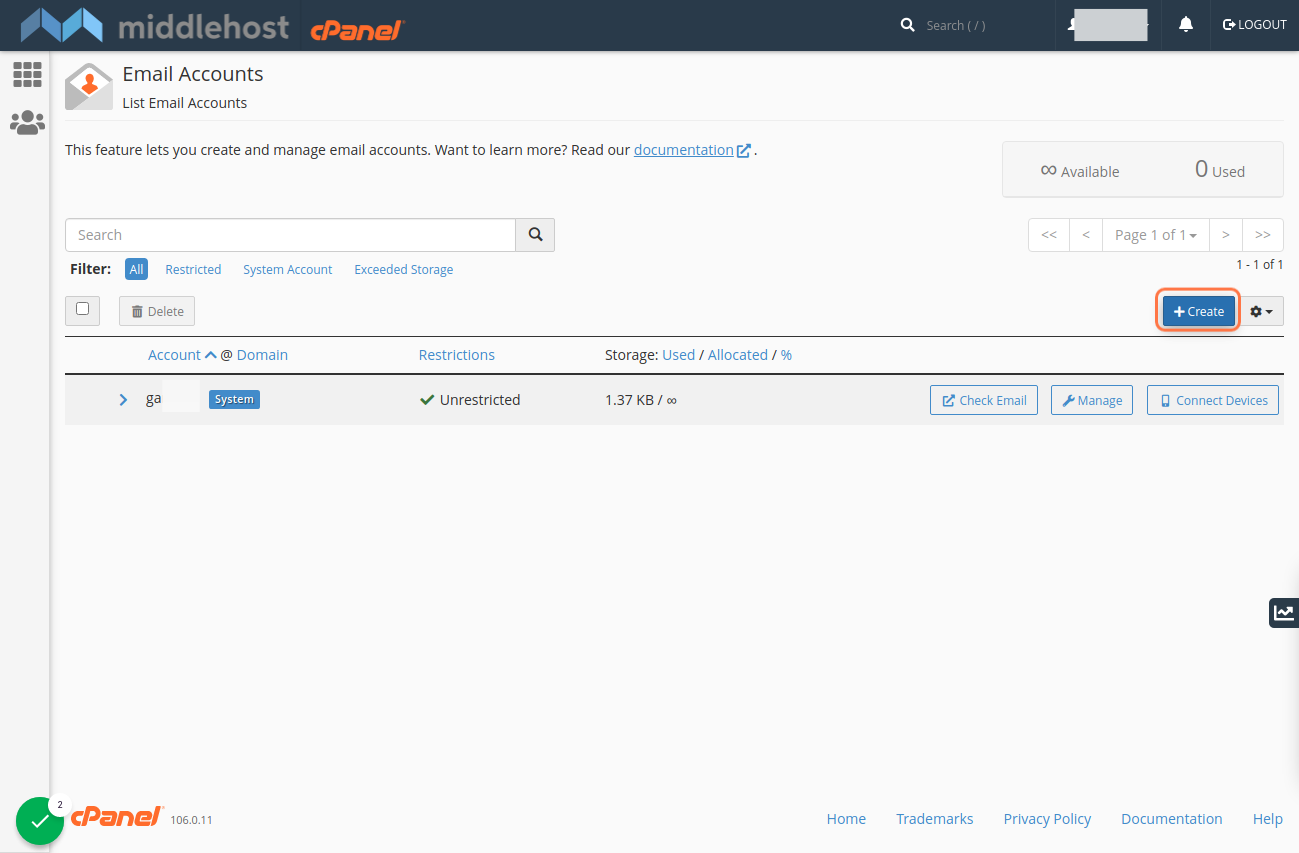
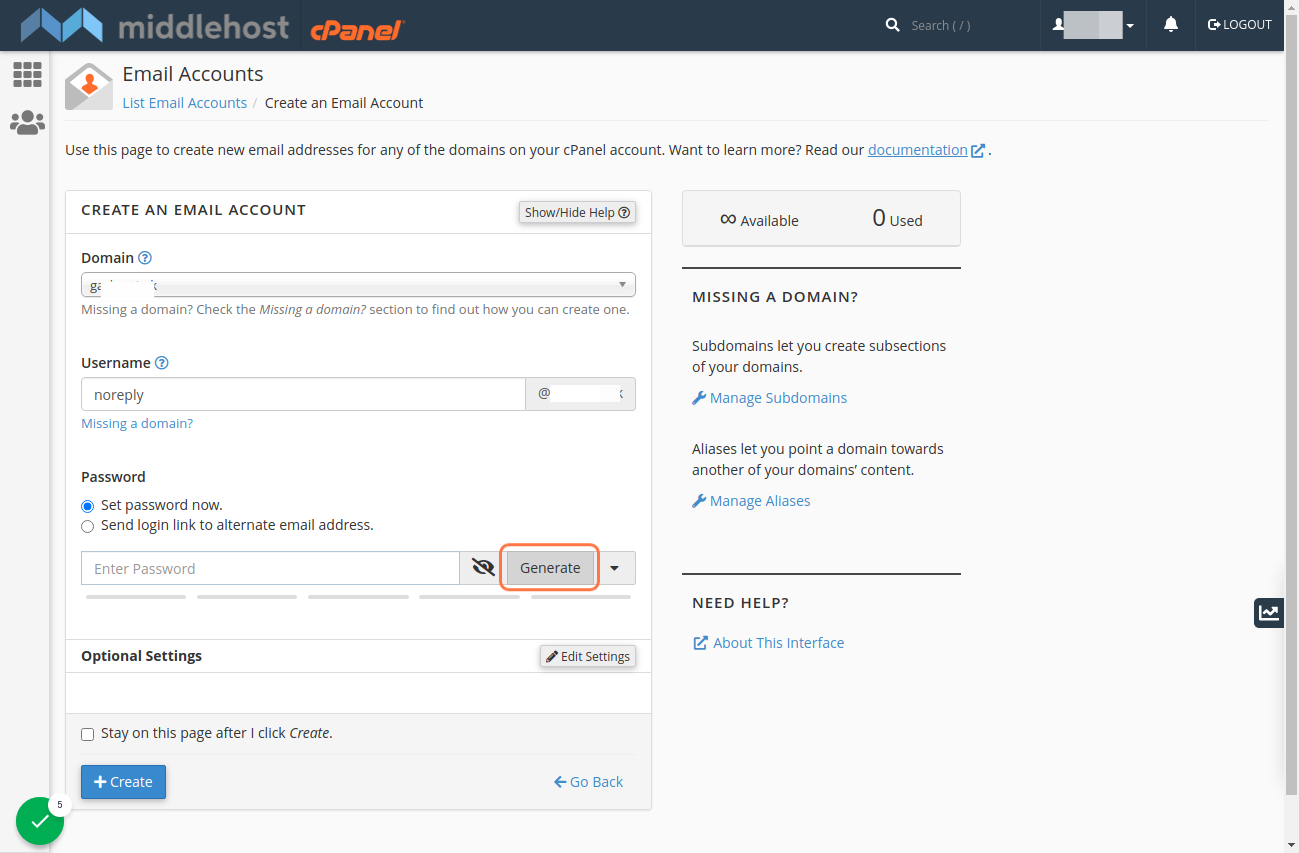
- Use "noreply" or any email address of your choice. This address will be used only for authentication.
- You can later configure the "From" email in WordPress.
4. Set a Password
- Click the password field, then click Generate to create a strong password.
- Click Create to finalize the email account creation.
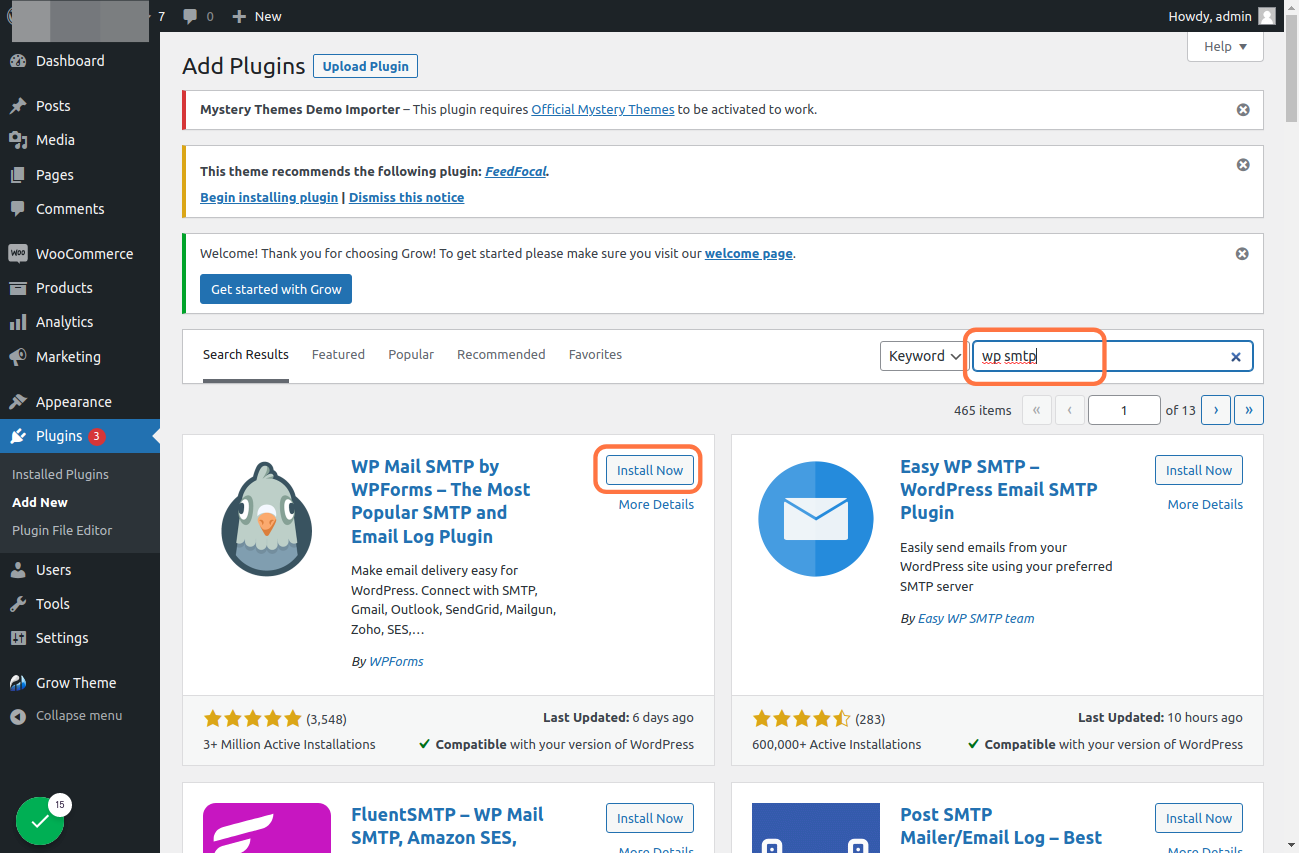
5. Install SMTP Plugin
- Login to your WordPress admin, go to Plugins > Add New, and search for WP Mail SMTP by WPForms.
- Install and activate the plugin.
6. Configure the SMTP Plugin
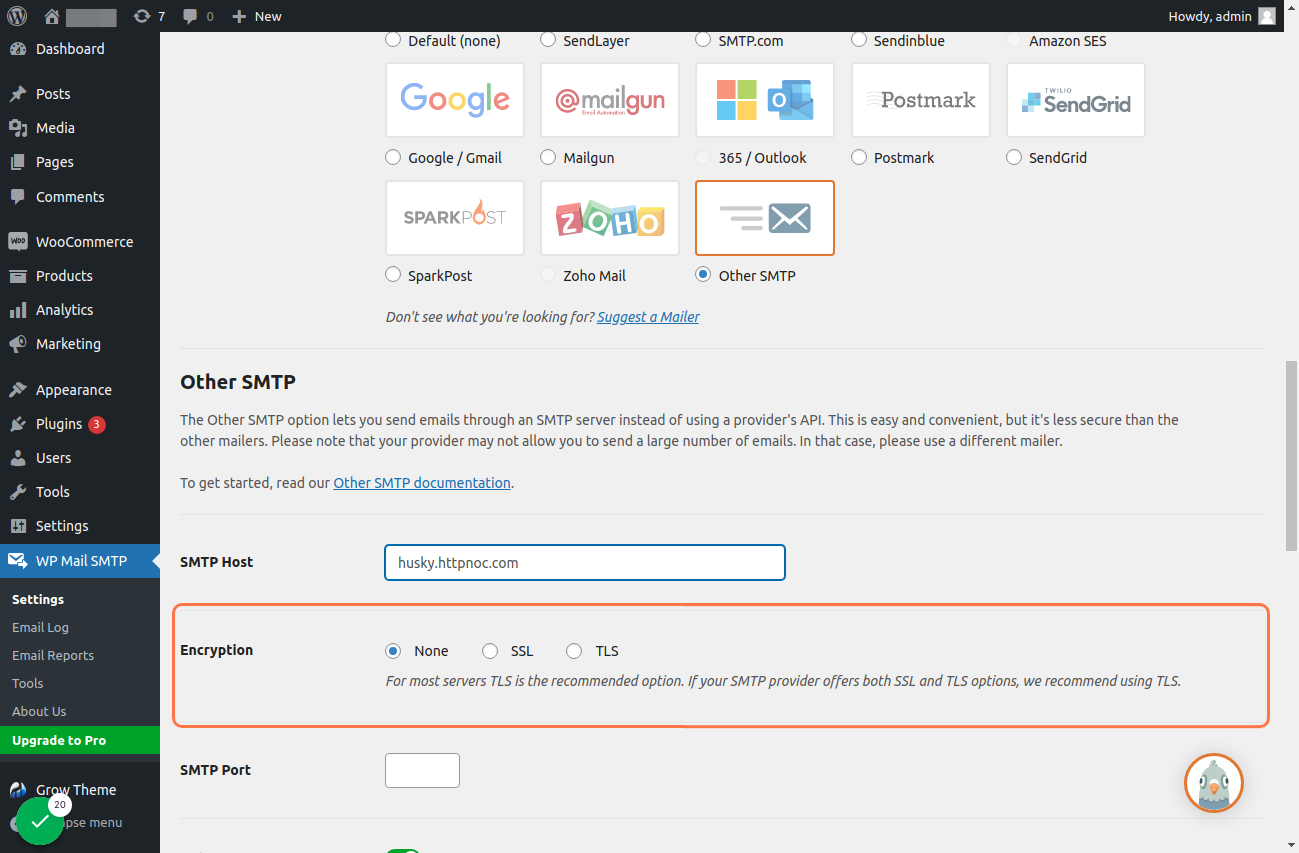
- Select Other SMTP in the plugin settings.
- Enter the hostname for your hosting account (contact support if unsure).
- Use the email address and password you created earlier.
- Set the encryption method to TLS.
7. Test the Email Configuration
- Click Save Settings and go to Email Test.
- Enter a test email address (Gmail, Yahoo, or Hotmail recommended).
- Click Send Email to test the setup.

Final Step
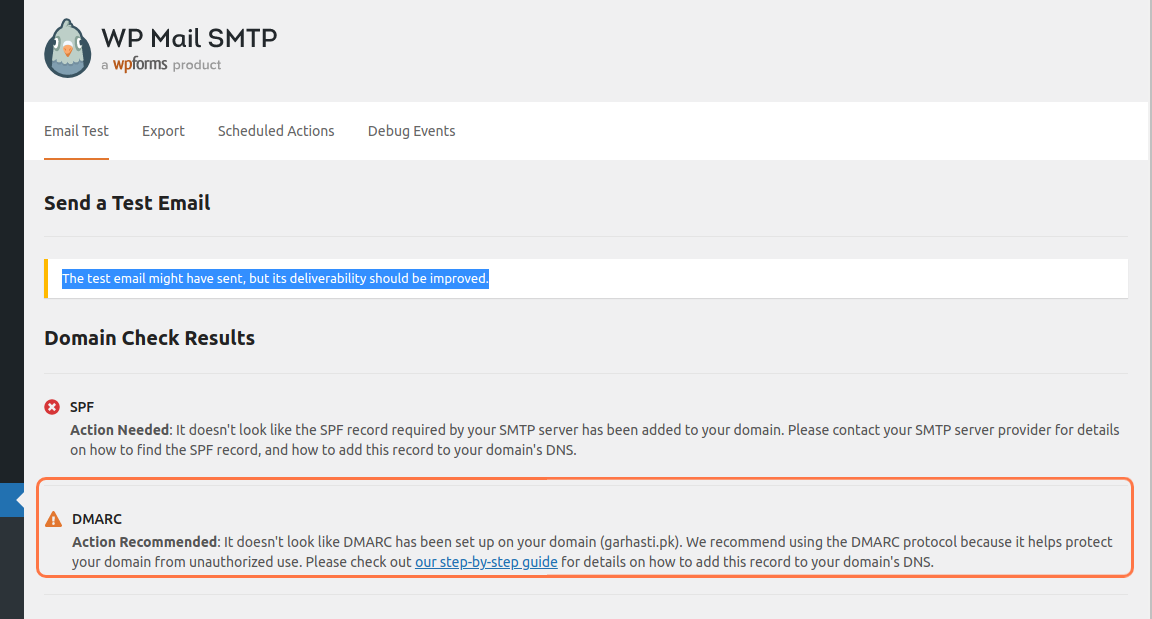
If the test email is delivered successfully, your WordPress SMTP is configured. Ignore any SPF or DMARC warnings for the test email.
This guide ensures your WordPress can send emails reliably through authenticated SMTP settings, enhancing email delivery and reducing the chance of messages being marked as spam.
